Speed Up & Secure Your Ghost Blog with Cloudflare (Free Tier)

Why You Need a CDN: Setting up Cloudflare for Your Self-Hosted Ghost Blog
If you followed my previous guide on Deploying Ghost on Ubuntu, you likely have a fast, self-hosted blog running on a VPS. It works great, but there is one small problem: your server is exposed.
Right now, your domain points directly to your server's IP address. If a malicious bot decides to target you, your server takes the direct hit. Furthermore, if your server is in Europe, a reader in Sri Lanka has to wait for data to travel halfway across the world.
The solution? Cloudflare.
Cloudflare acts as a shield and a turbocharger. It sits between your readers and your server, caching your content globally and hiding your real IP address.
In this guide, I’ll walk you through setting up Cloudflare for Ghost, avoiding the infamous "Redirect Loop" error, and configuring page rules to keep your Admin panel safe.
Prerequisites
- A self-hosted Ghost instance (Ubuntu/Nginx).
- Access to your Domain Registrar (Namecheap, GoDaddy, Porkbun, etc.).
- A free Cloudflare account.
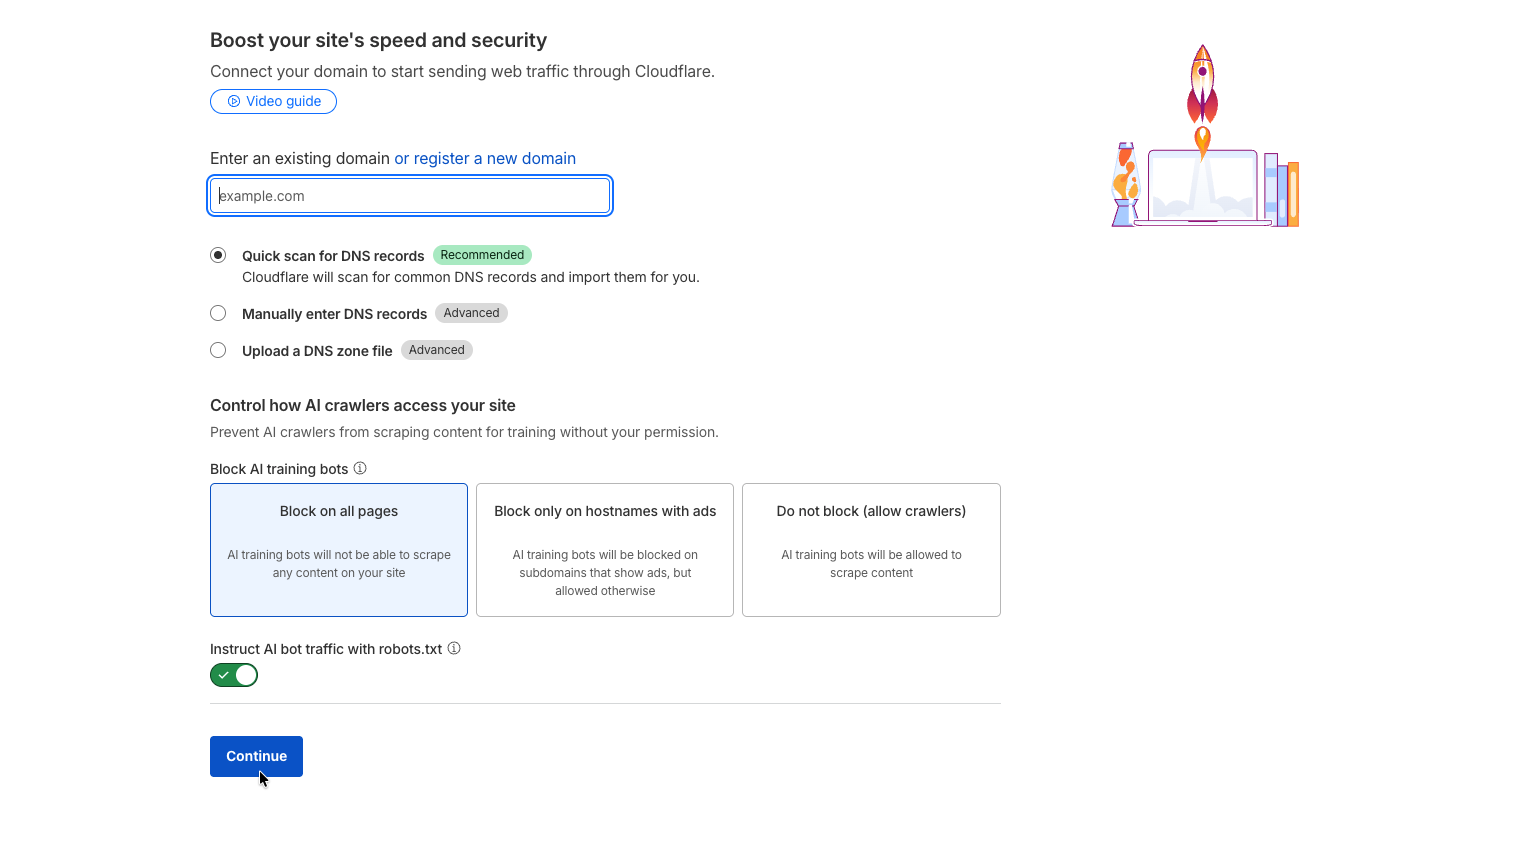
Step 1: Add Your Site to Cloudflare
- Log in to Cloudflare and click Add a Site.
- Enter your domain name (e.g.,
example.com). - Select the Plan: Scroll down to the bottom. You do not need the Pro plan. Click the Free tier box at the bottom.
- DNS Scan: Cloudflare will scan your current DNS records. Make sure the
Arecord pointing to your VPS IP address is there. It usually detects this automatically.
Step 2: Update Your Nameservers
Cloudflare will provide you with two nameservers (e.g., bob.ns.cloudflare.com and lola.ns.cloudflare.com).
- Log into your Domain Registrar.
- Navigate to your DNS Management settings.
- Change your nameservers from "Default" to "Custom".
- Paste the two Cloudflare nameservers.

Note: DNS propagation can take anywhere from a few minutes to 24 hours. In my experience, it usually happens within 10–15 minutes.
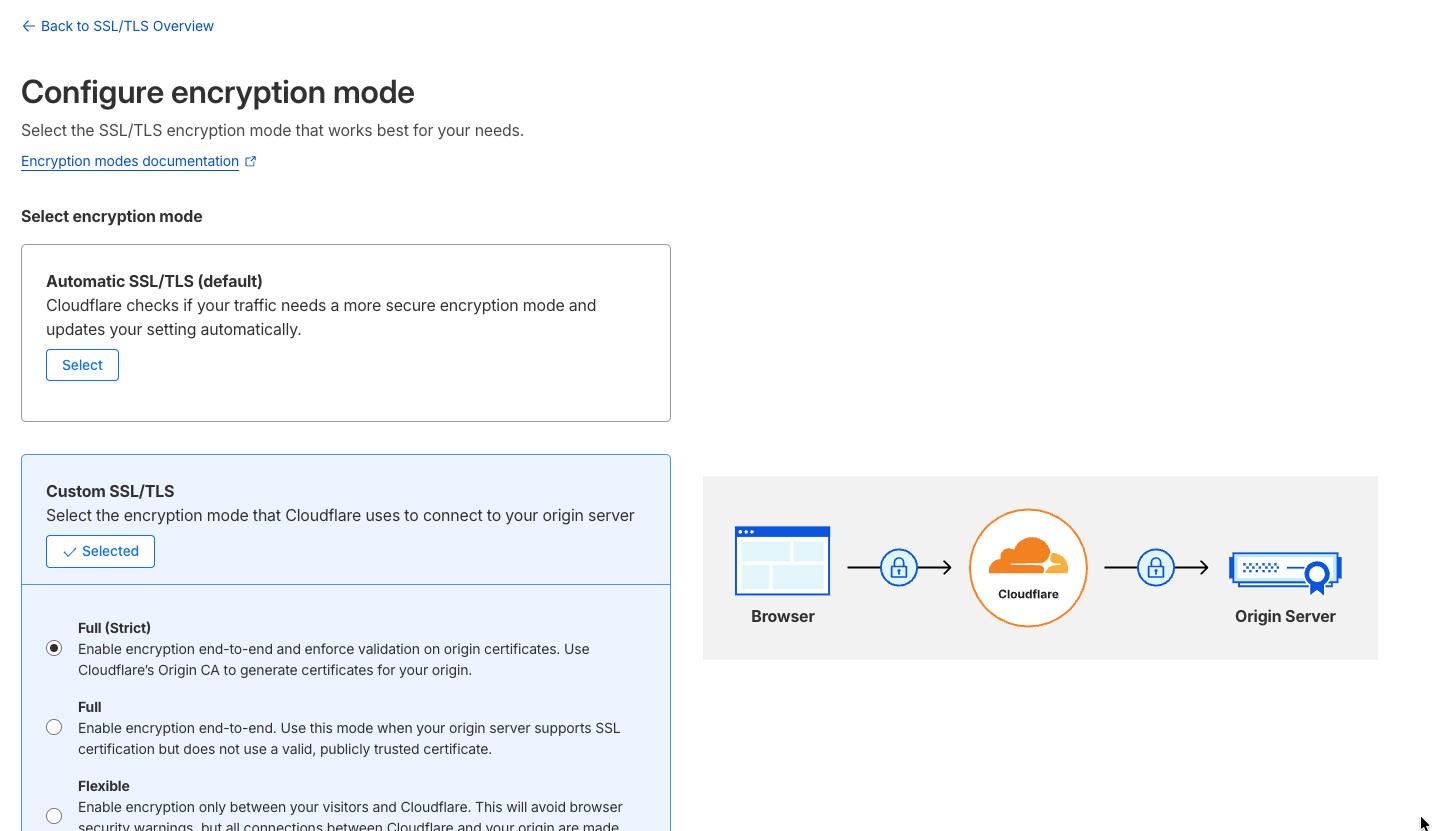
Step 3: The "Gotcha" – Avoiding the SSL Redirect Loop
This is where 90% of Ghost users get stuck.
If you installed Ghost using the CLI tool (ghost install), you likely already have a Let's Encrypt SSL certificate on your server.
If you leave Cloudflare's SSL setting on "Flexible", Cloudflare will try to talk to your server over HTTP, but your Ghost server (configured with Nginx) will force a redirect to HTTPS. This creates an infinite loop, and your site will crash with an ERR_TOO_MANY_REDIRECTS error.
The Fix:
- Go to the SSL/TLS tab in the Cloudflare dashboard.
- Change the encryption mode to Full (Strict).
- Flexible: Bad. Cloudflare talks to your server via HTTP.
- Full (Strict): Good. Cloudflare talks to your server via HTTPS using your existing Let's Encrypt certificate.
You are absolutely right. Cloudflare recently updated their dashboard (August 2024) and actually deprecated the "Auto Minify" feature, removing it from the UI entirely because modern browsers and build tools (like Ghost's internal build process) handle this better now.
Here is the updated Step 4 using the exact settings available in your current dashboard:
Step 4: Optimization Settings
Cloudflare has reshuffled their speed settings. Navigate to Speed → Optimization → Settings.
Here is how you should configure the available options for a Ghost blog:
- Protocol Optimization:
- HTTP/3: Ensure this is On. This is the latest, fastest internet protocol.
- 0-RTT Connection Resumption: Turn this On. It makes returning visitors load your site almost instantly.
- Content Optimization (Cloudflare Fonts):
- Cloudflare Fonts: Turn this On. This is a great new feature that hosts your Google Fonts directly on your domain, reducing external requests and speeding up page rendering.
- Speed Brain (New/Beta):
- This feature "pre-fetches" pages before a user clicks them. For a blog, this usually safe to leave On, but since it is in Beta, if you notice strange behavior in your analytics, turn it off.
- ⚠️ WARNING: Rocket Loader
- You will see Rocket Loader™ in the list. Leave this OFF.
- While it promises speed, Rocket Loader changes how JavaScript is loaded. This frequently breaks Ghost themes (especially search bars) and the Membership/Portal functionality.

Note on Auto Minify: You might notice "Auto Minify" is missing. Cloudflare recently deprecated this feature because modern web apps (like Ghost) already minify their code efficiently.
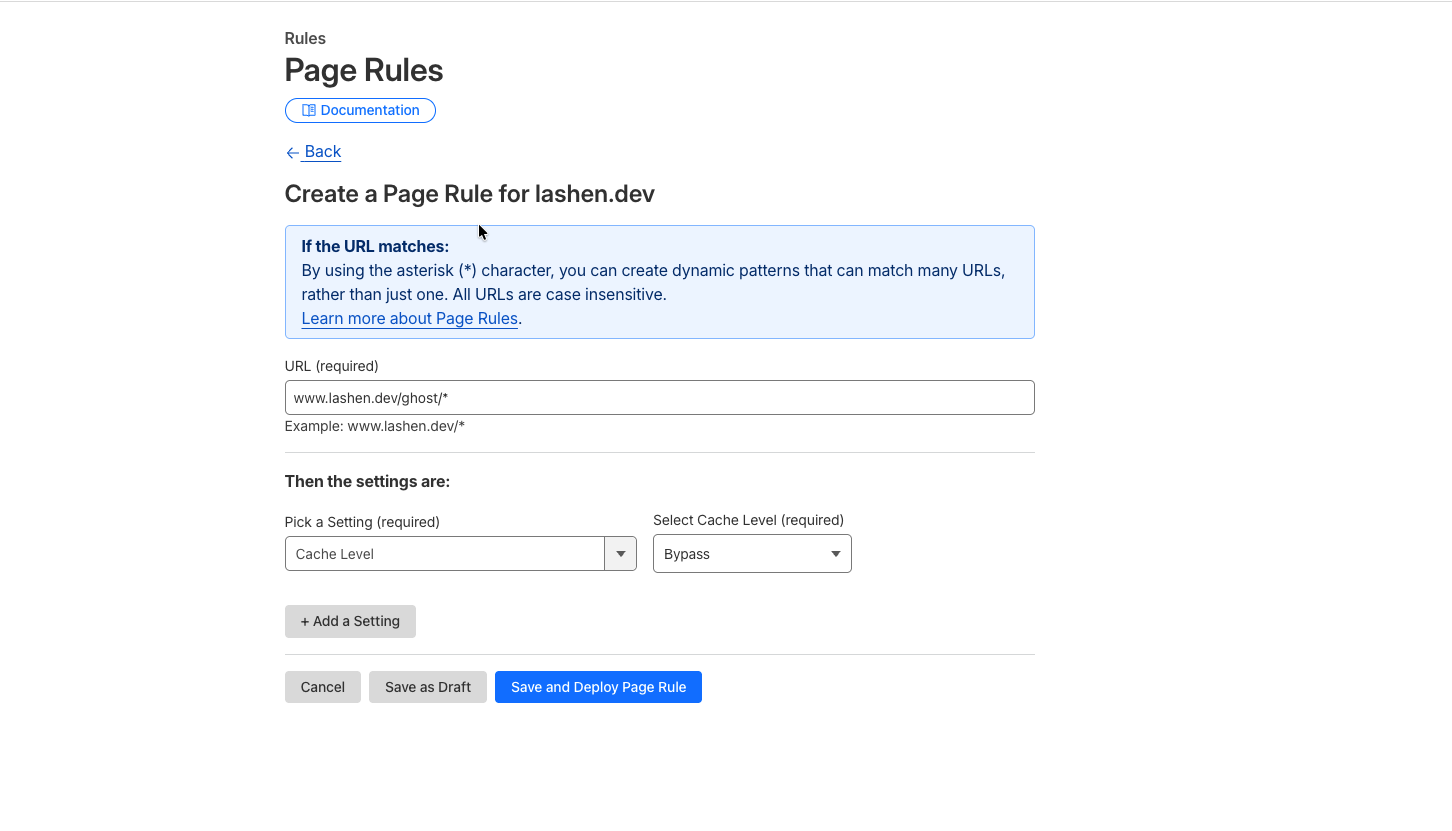
Step 5: Page Rules (Protecting the Admin Panel)
Cloudflare caches your content to serve it faster. However, you strictly do not want it caching your Ghost Admin panel (/ghost/) or your preview links. If it does, you might make changes to a post but still see the old version in your editor.
- Go to Rules → Page Rules.
- Click Create Page Rule.
- URL:
yourdomain.com/ghost/* - Pick a Setting: Select Cache Level.
- Value: Select Bypass.
- Click Save and Deploy.
This tells Cloudflare: "Cache everything for my readers, but when I'm in the admin panel, connect me directly to the server."
Bonus: Restoring Real User IPs
Since you are using Nginx (as per my previous guides), there is one final technical detail. Because Cloudflare is a proxy, Nginx sees all traffic as coming from Cloudflare's IP addresses, not your visitors' real IPs.
This matters if you are using fail2ban or my guide on "Restricting Access by IP," because you might accidentally block Cloudflare and take down your whole site.
To fix this, you need to tell Nginx to trust Cloudflare IPs. Open your Nginx config:
Bash
sudo nano /etc/nginx/nginx.conf
Add the following inside the http block (or create a separate file in conf.d):
Nginx
# Cloudflare Real IP Config
set_real_ip_from 103.21.244.0/22;
set_real_ip_from 103.22.200.0/22;
set_real_ip_from 103.31.4.0/22;
# ... (add full list of Cloudflare IPs)
real_ip_header CF-Connecting-IP;
(You can find the updated list of IPs on Cloudflare's documentation).
Conclusion
Your Ghost blog is now faster, your origin IP is hidden, and you have enterprise-grade DDoS protection for free.
If you check your site on GTmetrix or PageSpeed Insights, you should see an improvement in Time to First Byte (TTFB).
Next up: Now that our infrastructure is solid, I’ll be looking into automated backup strategies to S3 so we can sleep soundly at night. Stay tuned!